As the beginning of a new school year approaches, I am loving EVEN MORE my child’s favorites keepsake tile from my her kindergarten class last year. It was an adorable end-of-year gift from the kids and a sweet way to capture those memories.
The end of ANY school year is momentus, but something about ending Kindergarten was a really big deal! So I was super thankful to Hannah’s fabulous teacher and teacher assistant for taking their precious time to make this amazing keepsake tile.
I love it so much that I wanted to share with you how you could easily make one too!

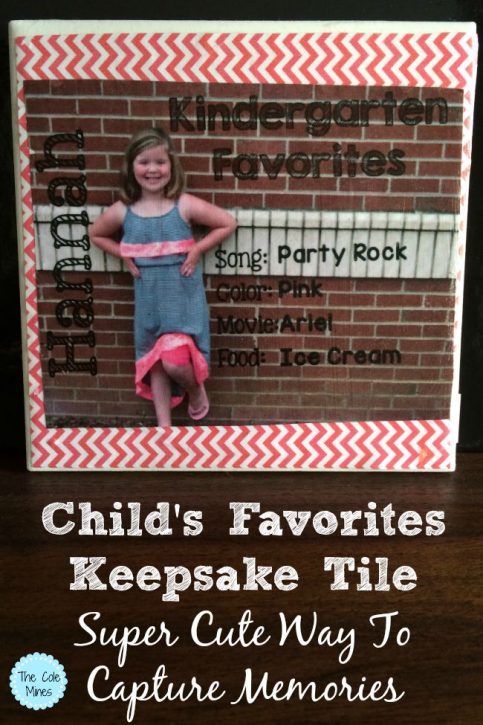
Step One – First, take a cute picture of your child – If they are wearing their favorite outfit, even better! Take care to ensure there is plenty of “empty” space around your child’s body. Note how her teacher made sure there was plenty of the brick wall as background since you will need area to write.
Step Two – Upload your digital image to a site such as PicMonkey. Choose a design that is smaller than 4×4 (so it will fit neatly on your tile). Create simple text overlays for your child’s name and his/her favorites. I love that her teacher asked her Favorite Song, Favorite Color, Favorite Movie and Favorite Food! Depending upon your background, you may want to make your overlay text be white to show up even more.
Step Three – Print that image in color. Trim to fit the tile.
Step Four – Head to the craft store. You will need:
- 4×4 white ceramic tile
- Cute scrapbook page with a background you love. You can either buy a 4×4 size or trim a larger piece to fit the tile.
- Mod Podge – I love the matte finish
- Small, 1 inch foam brush
Step Five – Lay your tile on a flat surface. Apply a thin layer of Mod Podge over tile, extending all the way to the edges. Apply your scrapbook paper on top of wet Mod Podge. Let this dry for 5-10 minutes.
Step Six – Apply another thin layer of Mod Podge and apply your printed photo on top of scrapbook paper. Let this dry for 5-10 minutes.
Step Seven – Apply 2 more coats of Mod Podge to the front of the tile, allowing 15 minutes of dry time between each application. Apply each coat as a thin layer, making sure to wrap all the way around to the sides, and smoothing out the front. It’ll look very opaque until it dries, but rest assured that it will dry clear!
Step Eight – Let it sit for 3 days to completely dry! This is really important so it won’t be sticky!
Would love to see your finished products shared on my Facebook page!

YOU MAY ALSO LIKE:


What a great keepsake idea! I’m not super crafty – but I know I could do this!!! Thanks for sharing!
Karen I am not at all crafty and I think I could too!!